
To connect analogue EMG signals into your Vicon System you will require a Vicon Lock Control Box, or in legacy MX systems an analog breakout box is required. For the purposes of this article we will focus on current systems.
Hardware
Your Lock can be connected to your system via a POE+ switch, similar to Vicon cameras or other Vicon Devices. Analog signals can be connected to the Lock using the supplied Weidmüller connectors. Make sure to note the pin number for each of the inputs. For more details on how to connect your external devices to your Lock have a look at the documentation from Vicon here.
Software
You’ll need to set up your analogue EMG signals in Vicon nexus.
In the resources pane
- Ensure that the system is in “Live” mode (if not, click on the “Go Live” button),
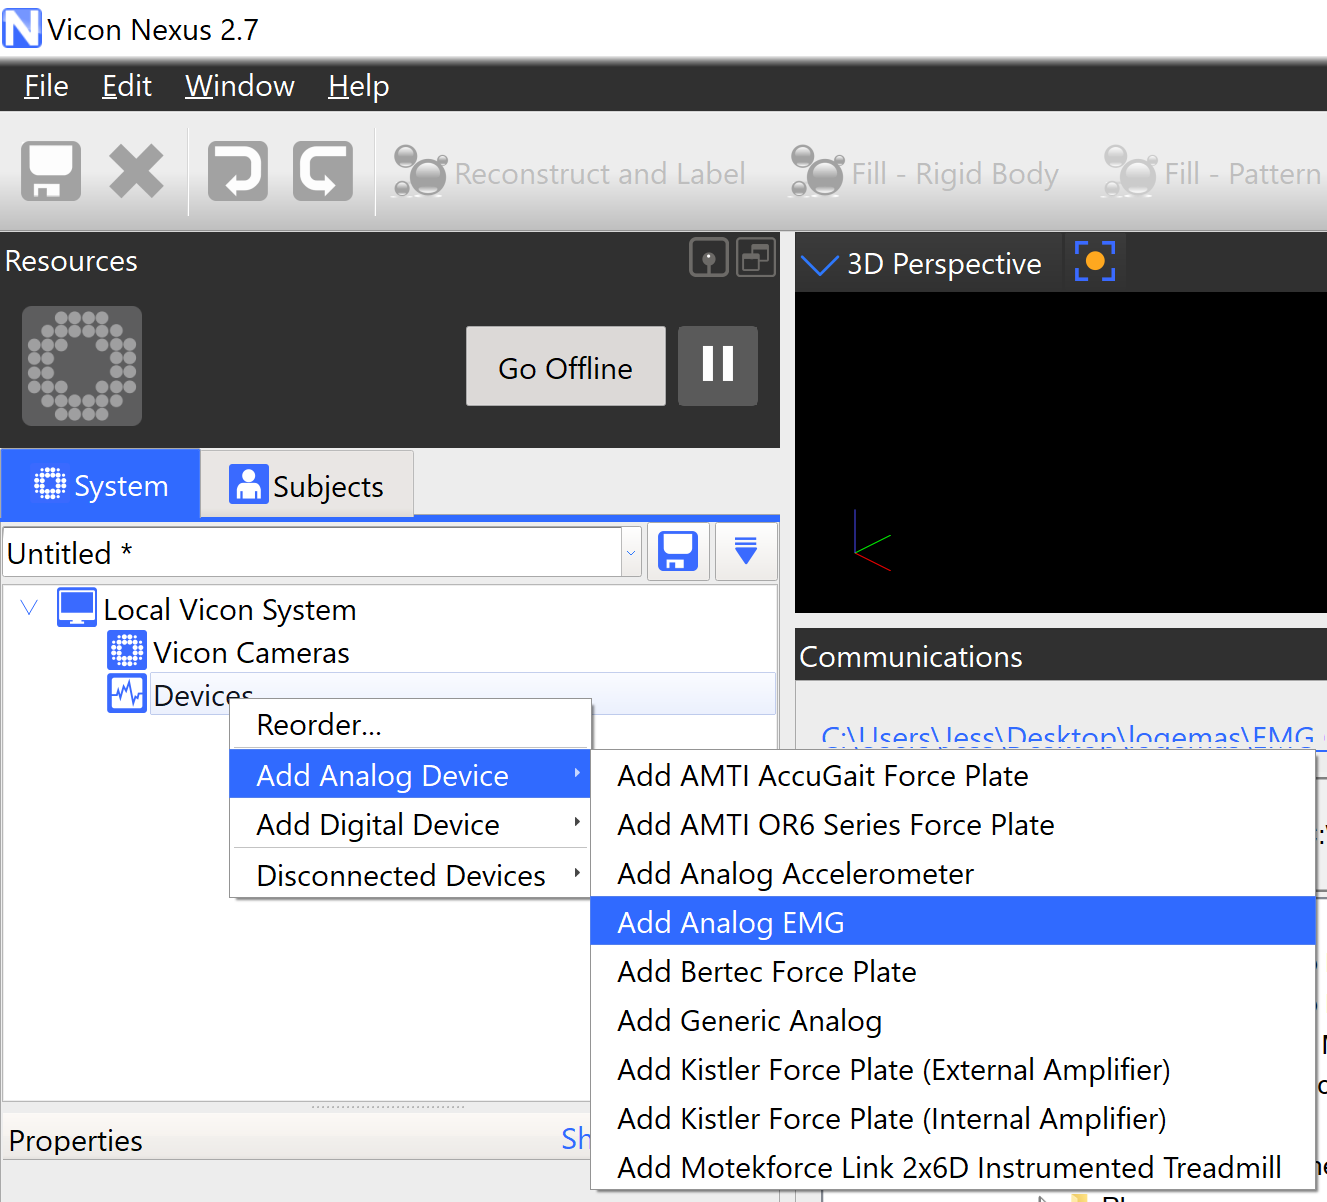
- Right click on Devices,
- Select “Add Analog Device”,
- Select “Add Analog EMG”
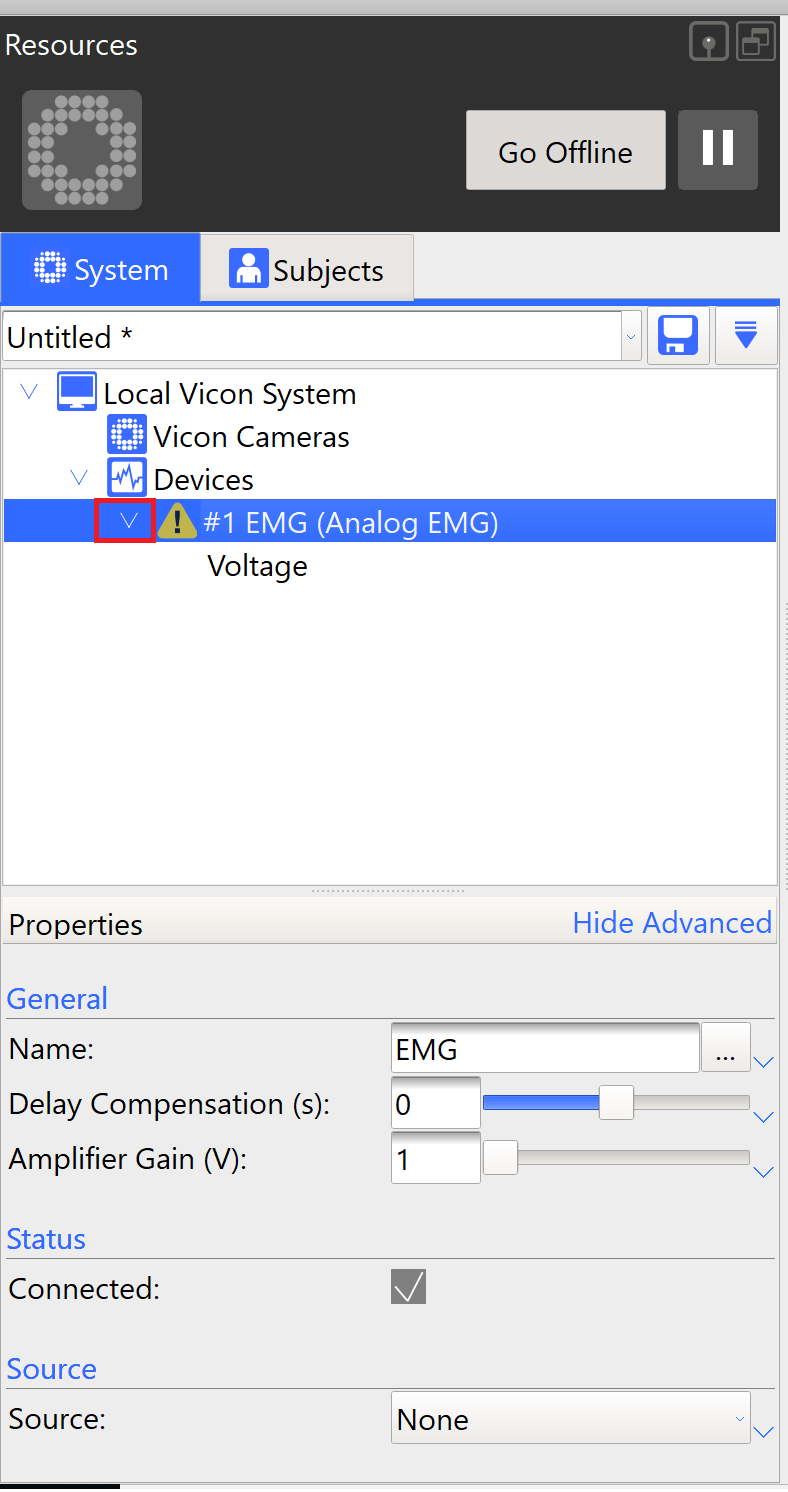
- Select the newly added EMG device.
- Adjust the name and Amplifier Gain in the properties section at the bottom of the pane.

- Select the appropriate source (in this case the Lock, in legacy systems this will be MX Giganet)

- Press the small arrow beside the newly created device (highlighted in the red box below).
- Right click on “Voltage” and add the required number of components (you may need to repeat this process until the correct amount are added).

Next you will need to adjust the individual components - Select the first component to open the properties at the bottom of the pane.
- Enter an appropriate name or leave as is, you can change this at any time.

- Select the appropriate pin, this is the pin number used to the input the signal to the Lock.
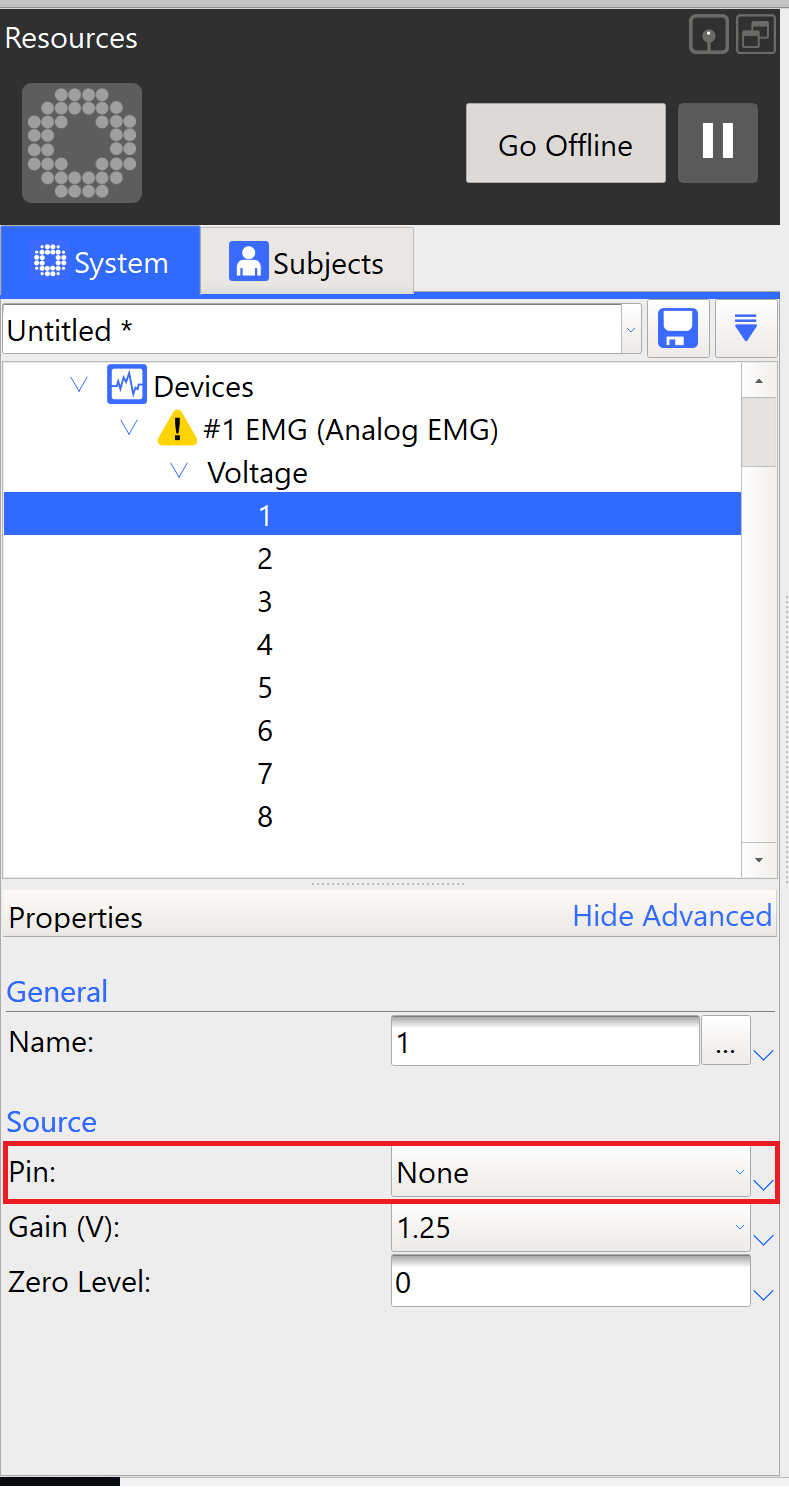
- Repeat this for the remaining components.
Your EMG channels are now set up and you can now test your EMG sensors!
For further Help on EMG head over to our EMG section. Or, for more information on adding force plates press here.