Vicon Nexus is a powerful software package that handles a range of input signals and performs powerful data handling and manipulation. Whilst it usually does a sterling job, sometimes, things go wrong. This page is dedicated to several of the most common errors and issues that occur with Nexus.
- My Cameras or Devices Won’t Connect! Check 1 – Windows Firewall
- My Cameras or Devices Won’t Connect! Check 2 – Network Card
- Nexus Crashes (NVIDIA Graphics Card Available)
- Includes how to check if you have an NVIDIA graphics card
- Nexus Crashes (NVIDIA Graphics Card Not Available)
- Final Notes
If you are installing Nexus for the first time on a PC and experiencing crashes, it is quite likely to be an issue with the graphics processor setup.
If you’ve previously had Nexus running smoothly, then most common issues occur after a software or a WIndows update. Vicon regularly releases updates for all of its software packages. We recommend updates be installed ASAP by manually downloading the install package from the Vicon website. For a major point update, a new instance of the software is installed on your PC, which Windows considers to be an entirely new program, potentially requiring some configuration to match how the previous version was set up. Most of then this is the Windows Firewall or Network Card Reconfiguration issues.
If you are still experiencing issues after working through these guides then please contact us at support@logemas.com and we’ll help to get you up and running!
My Cameras or Devices Won’t Connect! Check 1 – Windows Firewall
In short: Check the firewall permissions
If the cameras connected with the previous version of Nexus but don’t appear since the update, then the Ethernet data is likely being blocked by the Windows Defender Firewall. Vicon officially specifies that the Firewall should be turned off completely to ensure unobstructed communication with the cameras and connectivity devices, however sometimes institutional protocols don’t allow this for security purposes. If this is the case:
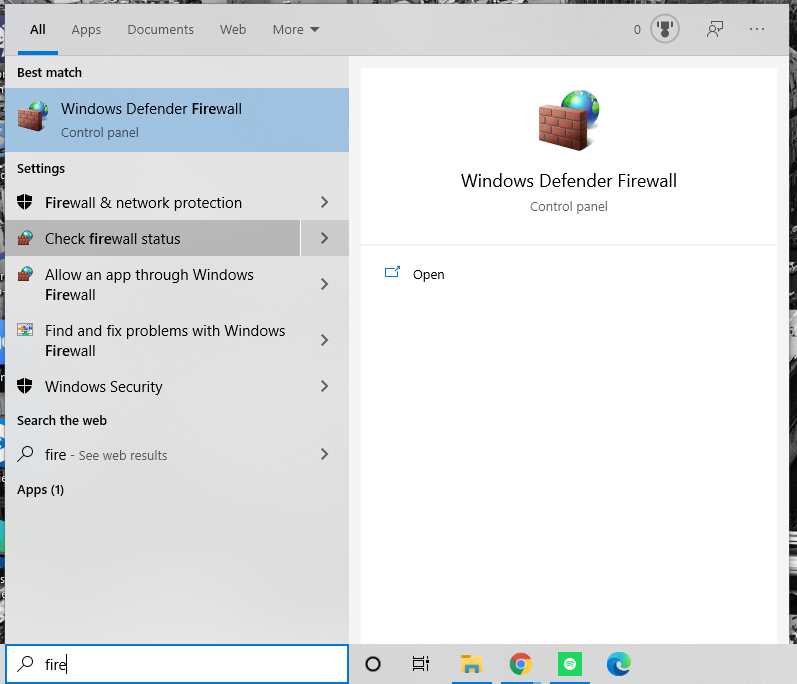
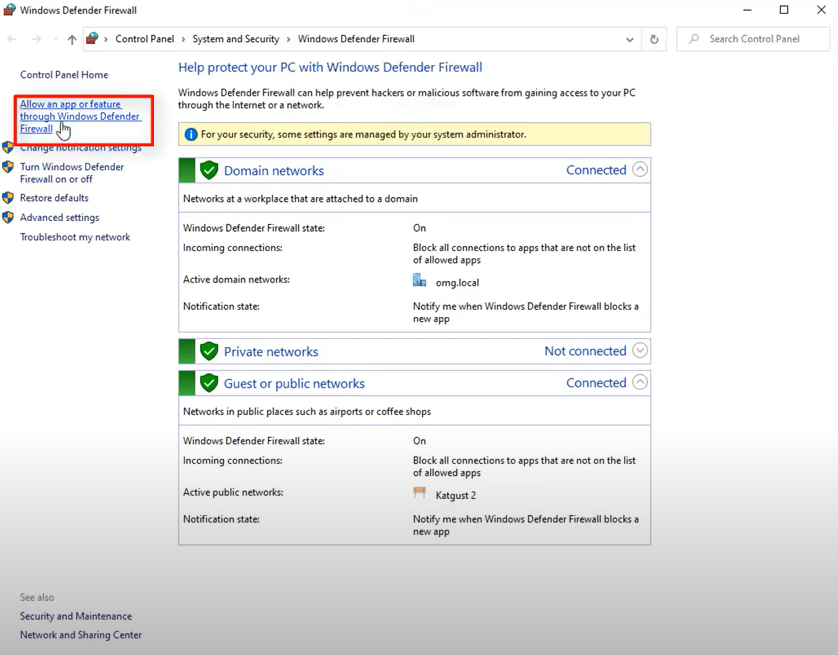
01. Go to Control Panel > Systems and Security > Windows Defender Firewall and click on Allow an app or feature through Windows Defender Firewall.
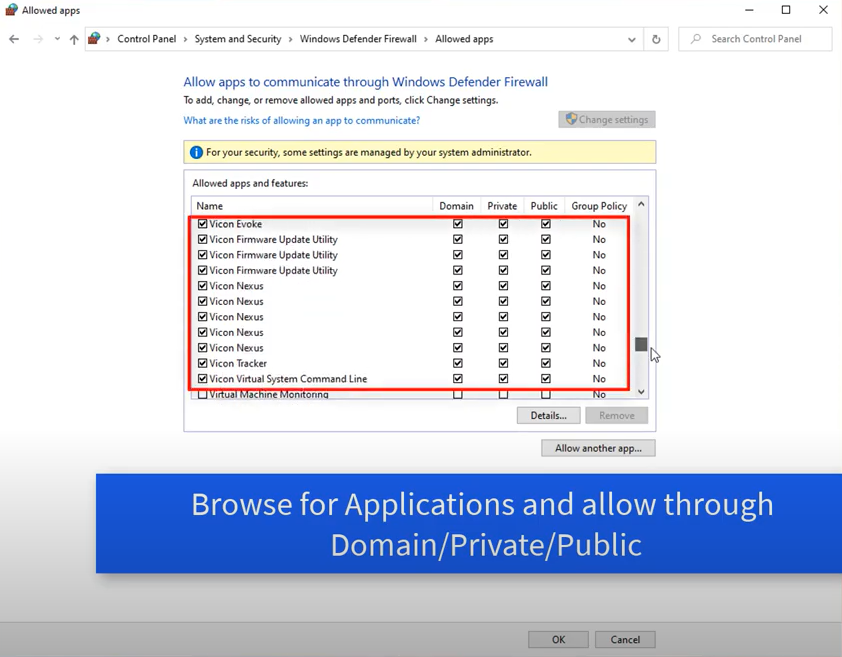
02. Scroll down the list of applications to look for the instance of Vicon software (Vicon Nexus, Vicon Tracker, Vicon Shogun, Vicon Evoke).
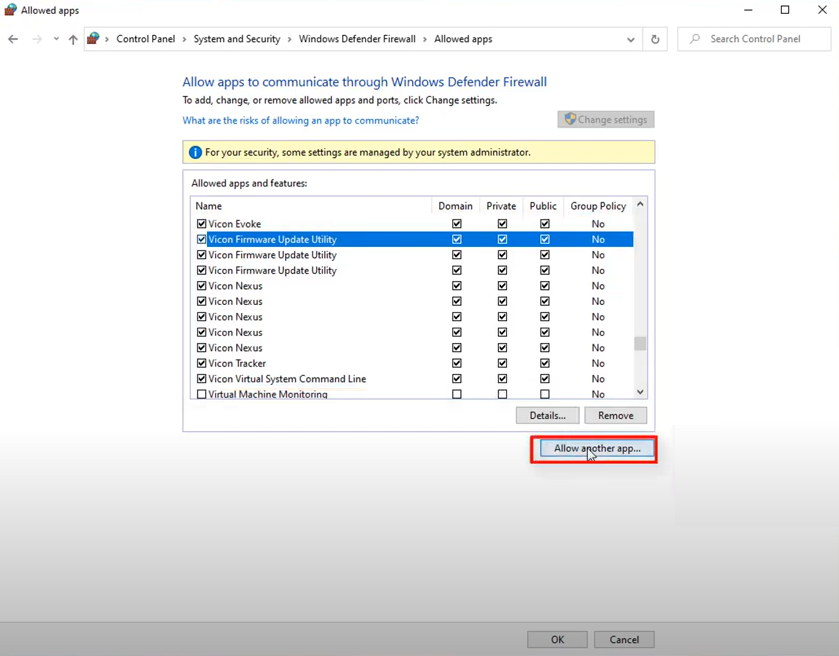
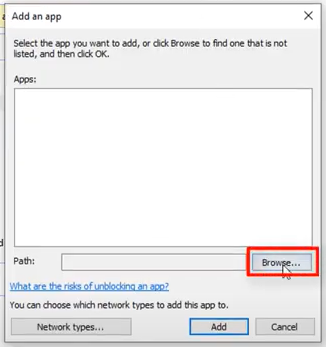
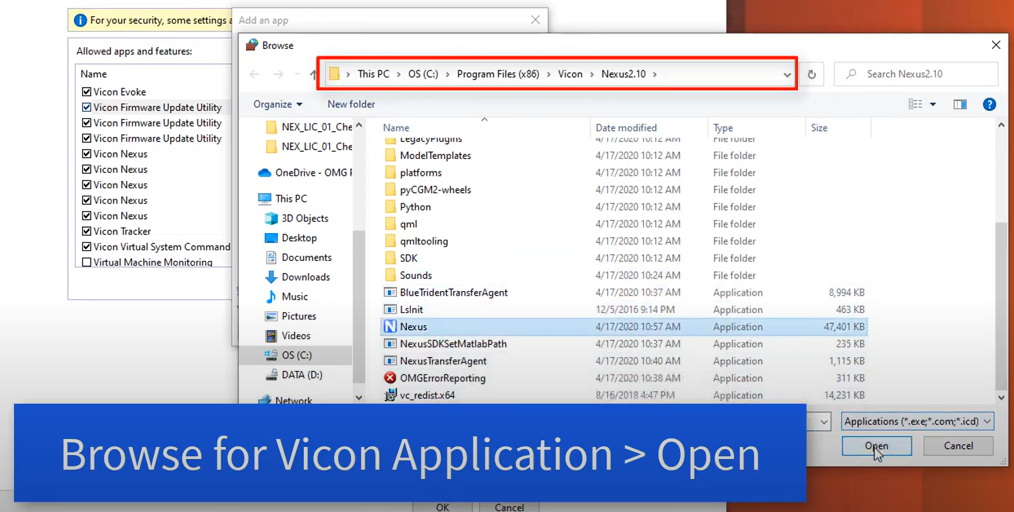
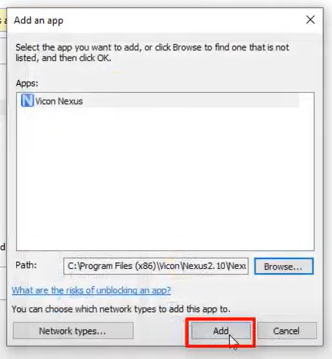
03. Select the application and click Details to ensure it refers to the version you are trying to run. If you cannot see it listed, click Allow another app > Browse. Open the Nexus version you require. Click Add.
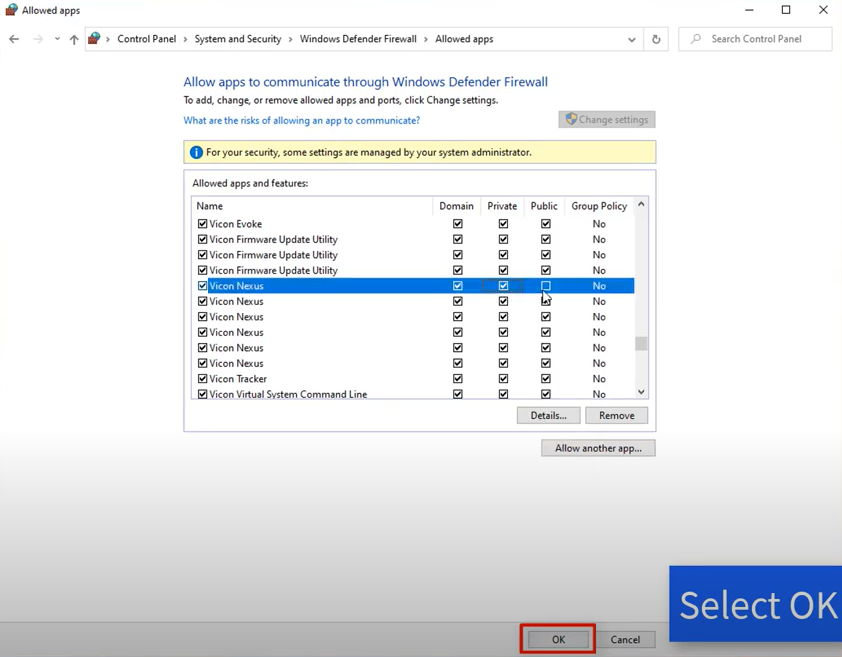
04. Click on Change Settings to enable the networks (Domain, Private, Public) that match those of the previous version. If this option is disabled then please contact the system’s administrator or your institution’s IT personnel for assistance.
05. Click OK.
05. Click OK.
06. Restart the Vicon software.
Video tutorial:
My Cameras or Devices Won’t Connect! Check 2 – Network Card
In short: Check the network card settings
Occasionally Windows or institution updates can wipe/reset the network card settings. The most common reason is a driver update reverting network card settings to default. You can check this by searching for Network Connections, right clicking on the port the Vicon system is connected to and configuring it through this portal.

There are two sections to configure.
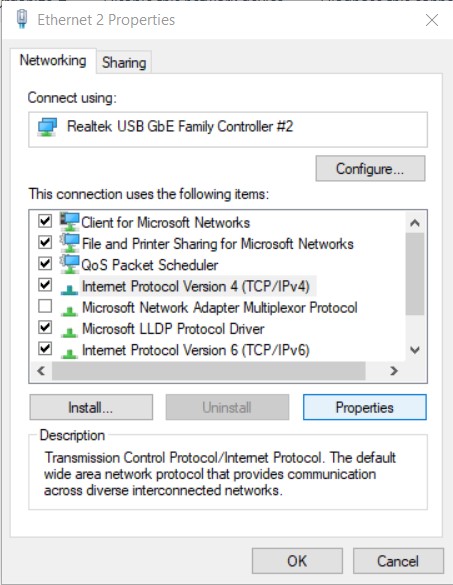
01. The first section to check is the Internet Protocol Version 4 (TCP/IPv4) properties.The Vicon port needs to be set to the static IP address 192.168.10.1 with a subnet mask of 255.255.255.0. If this isn’t the case then change the IP address and save by exiting the settings and clicking OK on the properties window, give the network card a moment to reset.
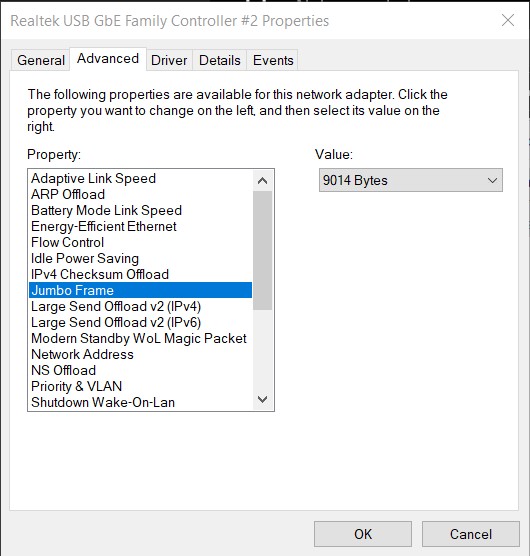
02. To access the second section you will need to re-enter the properties and click ‘Configure…’, then navigate to the advanced tab. The following settings, if available, need to be adjusted:
- Jumbo Frames > enabled to maximum possible value
- Interrupt Moderation > disabled
- Interrupt Moderation Rate > off
- Receive Buffer > maximum possible value
- Receive Side Scaling > enabled
- Receive Side Scaling Queues > maximum possible value
Note: you may not have all these options available for your network card, just change all the settings that are available to you. Jumbo Frames and Receive Buffer are common and required. If you have any questions about network card compatibility please contact us at support@logemas.com.
Official Vicon Documentation: Configure Network Card Settings
Vicon Software Crashes (NVIDIA Graphics Card Available)
If your Vicon software continuously crashes after you’ve installed it or since your latest update, it is possibly an issue with the graphics processor. First, you will need to determine whether you have a supported NVIDIA graphics card available on your machine. To do this,
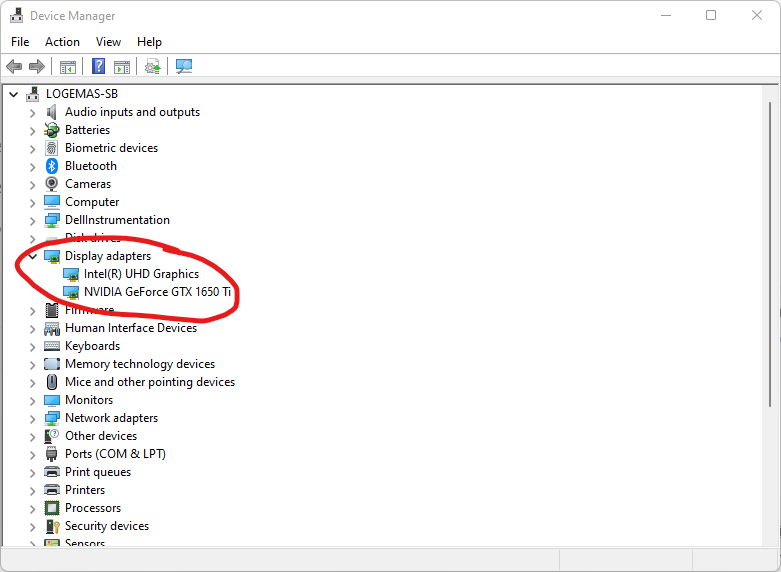
- Open Device Manager from the Start menu. This will provide you with a list of all the current adapters in the laptop or PC
- Expand the Display Adapters option in the list
- You should see 2 lines
- The integrated graphics
- An NVIDIA graphics card
- If you don’t see the dedicated graphics card you may need to check and install the drivers for the card. You can find a guide for that here.
If you don’t have a graphics card you’ll need to see the next section, Vicon Software Crashes (NVIDIA Graphics Card Not Available)
Next, you’ll need to tell Windows to use your dedicated graphics card for your Vicon software.
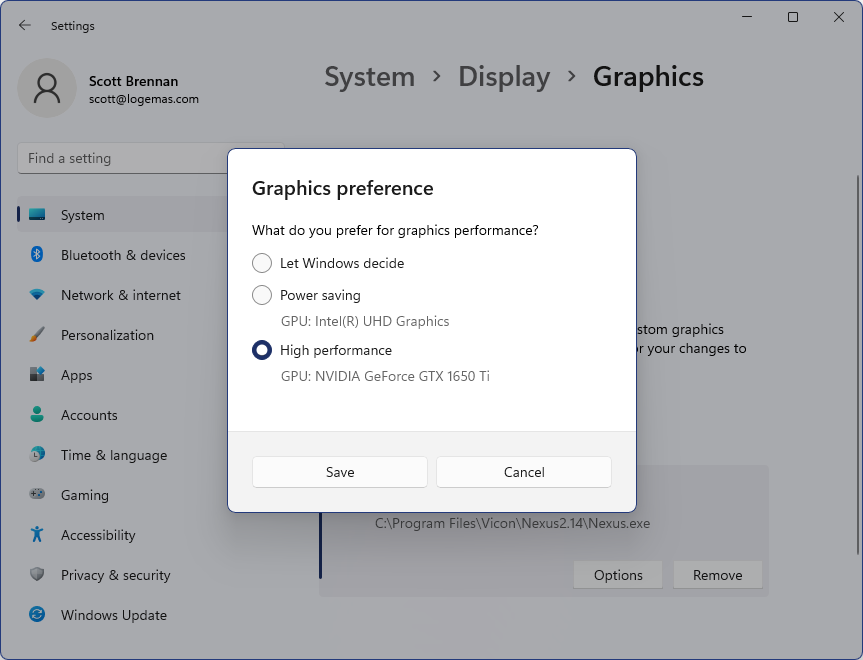
- Open Settings > System > Display > Graphics
- Scroll down or search the list for your Vicon software (Nexus, Shogun, Tracker)
- Select your Vicon software in the list and then click on Options. The default setting will be to Let Windows Decide but we want to make sure Windows is set to always use the dedicated graphics card.
- Select the High Performance option and Save the setting.
- If you have multiple Vicon software installations you will need to follow this process for each one.
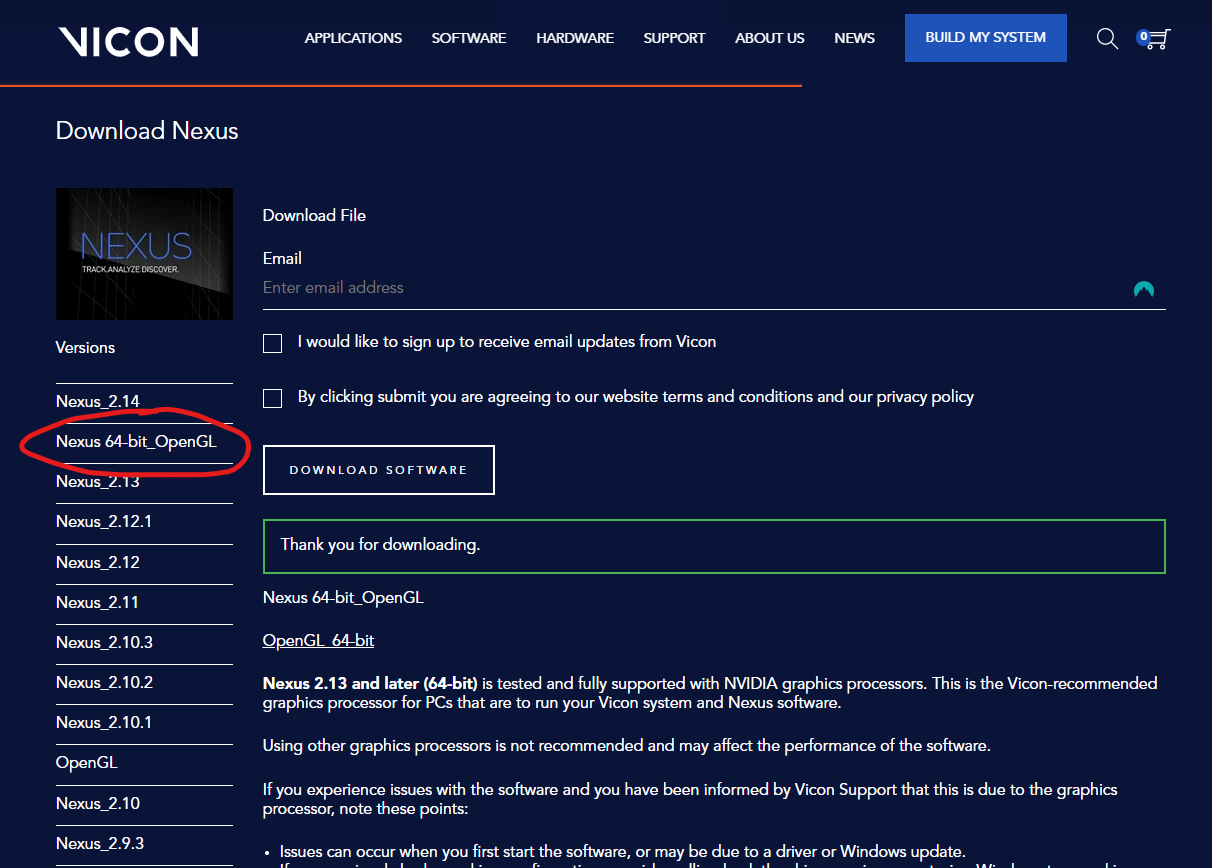
Vicon Software Crashes (NVIDIA Graphics Card Not Available)
If an NVIDIA graphics processor is not available and you experience a software crash, the following workaround may help. It involves installing an additional file to the software program directory (e.g. Nexus). To do this, you need read/write access to this location and may require the help of an administrator.
- Download and unzip the file found in the Nexus 64-bit_OpenGL section on the left of the Downloads section of this page.
- Locate the file opengl32.dll. Note that the filename is meant to be opengl32.dll.
- With the software closed, place the opengl32.dll file in the folder that contains the Vicon software executable (.exe). For example C:\Program Files\Vicon\Nexus2.14
- Launch the software.
- Repeat Step 3 for any other instances of the software (Nexus 2.13 and later).
Note: This solution mitigates any issues that are due to the graphics processor which you may experience while you’re running Vicon software, however, performance, such as general navigation, may be adversely affected. This solution has been tested on a limited number of Intel graphics cards for Windows 10. If this solution fails, your PC may simply not have the processing capabilities to handle the Vicon software.
Final Notes
- Licences are attached to version series (e.g. 1x.xx or 2.x.xx) and do not need to be renewed with point updates
- Official Vicon FAQ: Vicon FAQ: I just installed the latest version of software but the cameras no longer connect when I run it.
- Here are a couple of other pages which might help you with system connection issues:
- Help my Vicon system won’t connect!
- What do I do if my cameras aren’t being recognised by my Vicon software?
If you are still experiencing issues then please contact us at support@logemas.com!
By Cassy Mingin