
Use the following process for connecting your force plates with analogue connection into Vicon Nexus.
There will be a set number of pin inputs your force plate will require. I will use an AMTI OR6 plates as an example which require the six pins for Fx, Fy, Fz, Mx, My and Mz voltages.
Right click on devices in the resource panel and select the appropriate device.
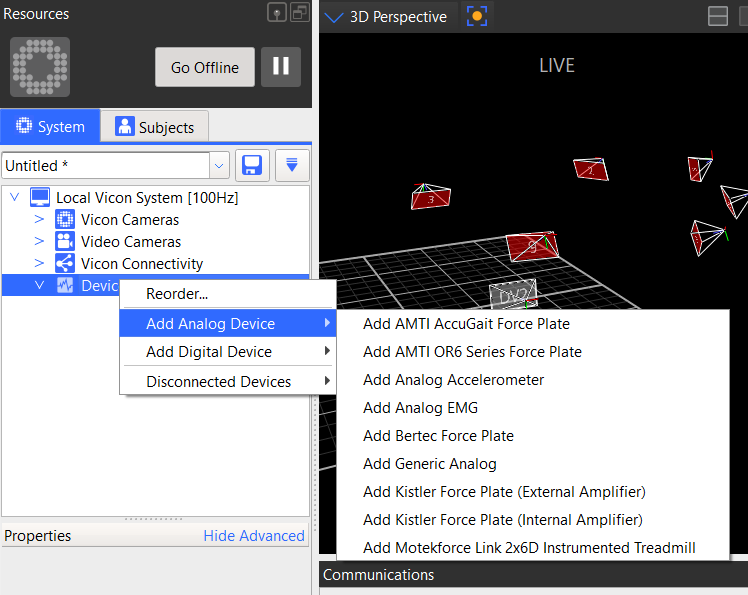
- In the Add Analogue Device, select the appropriate force plate type.
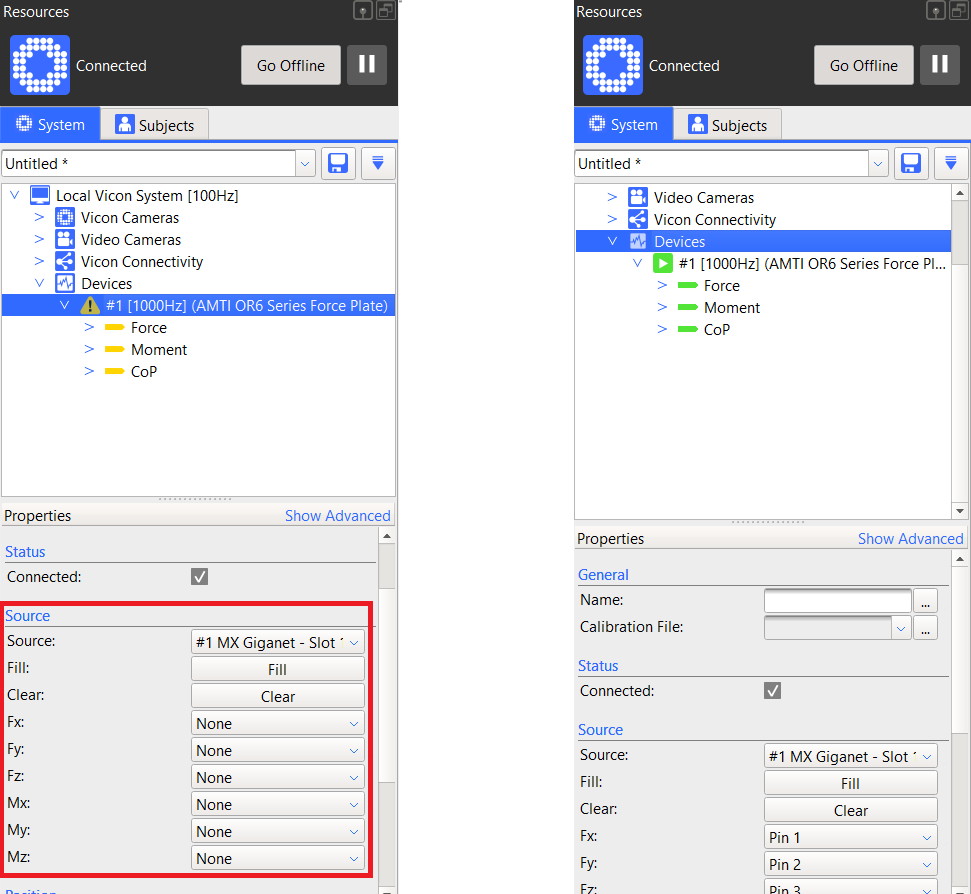
- Once added, check the device properties and find the Source settings.
- Select the correct source from the drop down menu. You will only be able to select connected sources. In this case I have selected MX Giganet, but this may be your Vicon Lock or other connectivity device that your force plate is connected to.
- Name the force plate under general properties.
- Add the calibration file
- Select the correct pins for each of the voltage inputs under source properties (image below, left). Your device and voltages will now be set and if your system is on should show up as connected with a green arrow (image below, right
- Check your force plate is working correctly by opening graph view and checking that you have the expected forces being displayed (an easy check is standing or walking on them)
Having issues with your connections? Check the following:
- If using a system with more than one Giganet check that you have the correct Giganet selected as the source.
- Ensure that every signal has an analogue pin assigned. If Nexus is having an issue with one signal it may flag the entire device as having an error.
- Ensure that you’ve added it as an analogue device.
Need to connect a different analogue device? Follow our guide here.