
Introduction
Once you’ve captured data with your Vue cameras, you need to ‘transfer’ it to the session folder with the rest of the datafiles. During this transfer we have the additional option to encode the video footage. This step is necessary for a couple of reasons:
- The raw video is usually written to a separate drive (an SSD where possible), away from the other recorded data, due to the intensive write speeds required to capture the video.
- The raw files are large and can take up a lot of valuable hard drive space. Encoding the video can compress the file to a much more manageable size.
- The video is saved in a raw VVID (Vicon Video) format. This can be viewed in the Vicon Video Viewer, which is installed alongside your main Vicon software, however it can’t be opened in any other software (including other Vicon softwares). Encoding allows us to output the video in a more accessible format, in this instance, AVI.
Basic Video Transfer
To transfer video, you will need to be on the machine that recorded the original data/video, with the VVIDs still in the place they were originally saved (this is the Capture Path option under each Vue Camera in the system tab). If the VVIDs have been moved it is extremely difficult to perform the transfer so please perform this step immediately following data collection!
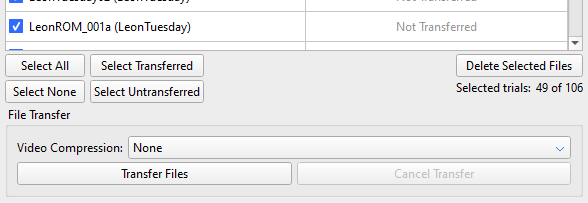
To transfer video:
- Open the file transfer tab (Video below),
- Select the trials you want to transfer video for,
- Choose video compression,
- Click transfer files
There is also the option to export with no video compression, simply leave/select None. The AVI outputs from this setting are massive, however if you are on a PC without any other options or are pressed for time you can select this option and amend later (see Apply a Codec to Video below).
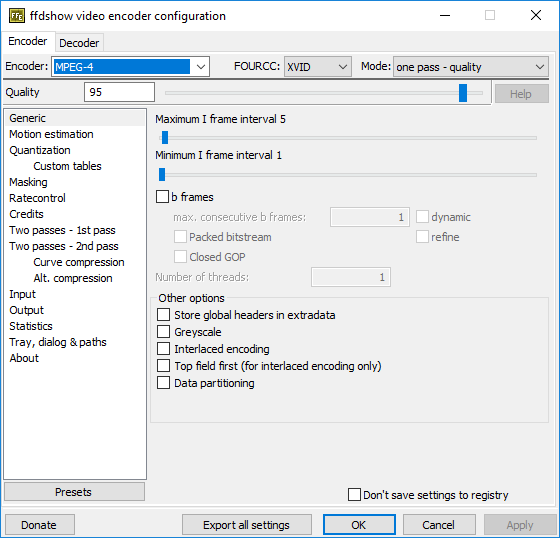
Logemas and Vicon recommend using the ffdshow plugin to create manageable video files with no noticeable loss in quality (see Set Up FFDShow Codec for Vicon)
Set Up FFDShow Codec for Vicon
- Download the plugin: https://www.vicon.com/software/third-party/ffd-show/
- Extract/decompress the folder
- Run ffdshow_rev3562_20100907.exe
- Ensure other Vicon software is closed
- Accept all default settings
- Run VFW configuration
- Enter these settings (feel free to play with/adjust, but I found these ones work well):
Apply A Codec to Video
Check out our Quick Bite video here!
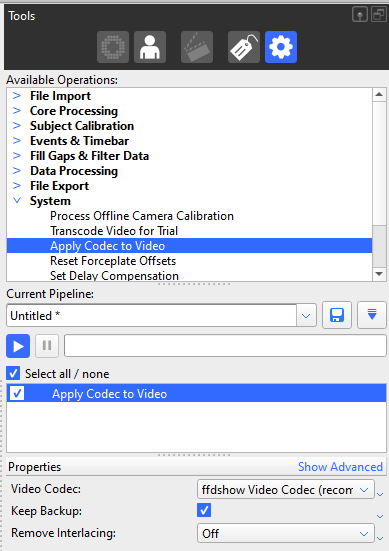
If you’ve transferred videos in raw format (no compression), you can still apply a codec to get smaller video files. Check out the video here, or follow these steps:
- Open trial in Vicon software (Nexus, Shogun)
- Select operation Apply Codec to Video from Available Operations
- Set properties
- Choose codec (ffdshow if available, see Set Up FFDShow Codec for Vicon)
- Keep Backup (if deselected only the newly transcoded video will be kept)
- Remove Interlacing (default: off)
Video Overlay and Export
Did you know: Nexus has features that allows you to a) overlay 3D marker data onto 2D video, and b) export that video so you can use it external to Nexus?
You will need to have already transferred your videos as per Basic Video Transfer. If you have Vue or third party videos associated with your trials, the yellow ‘Media’ button will appear:

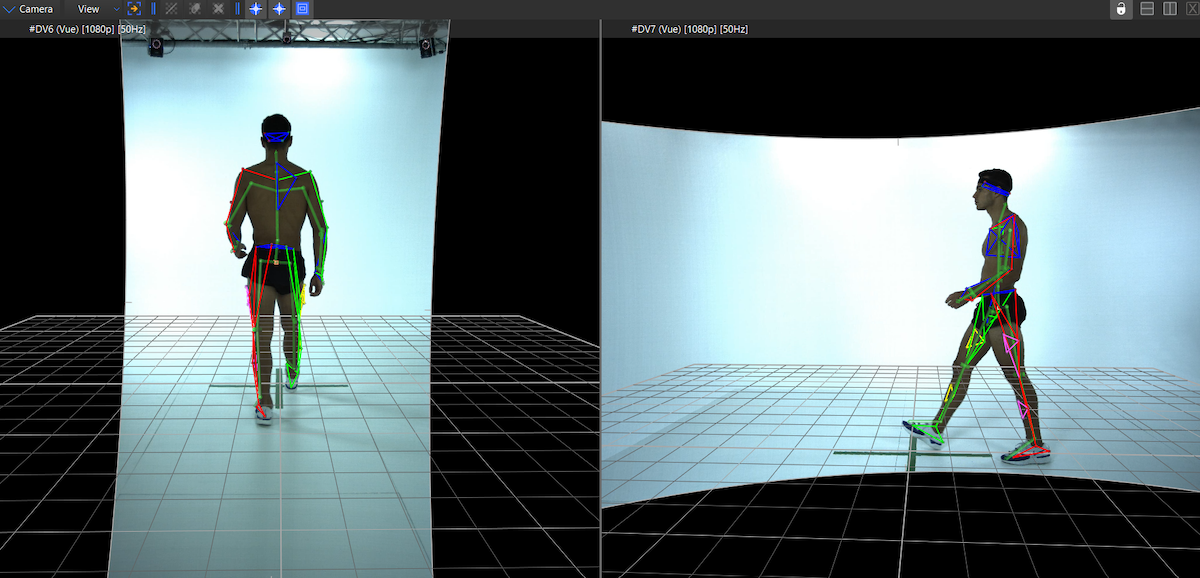
Unaltered Vue footage
Overlay Marker Data
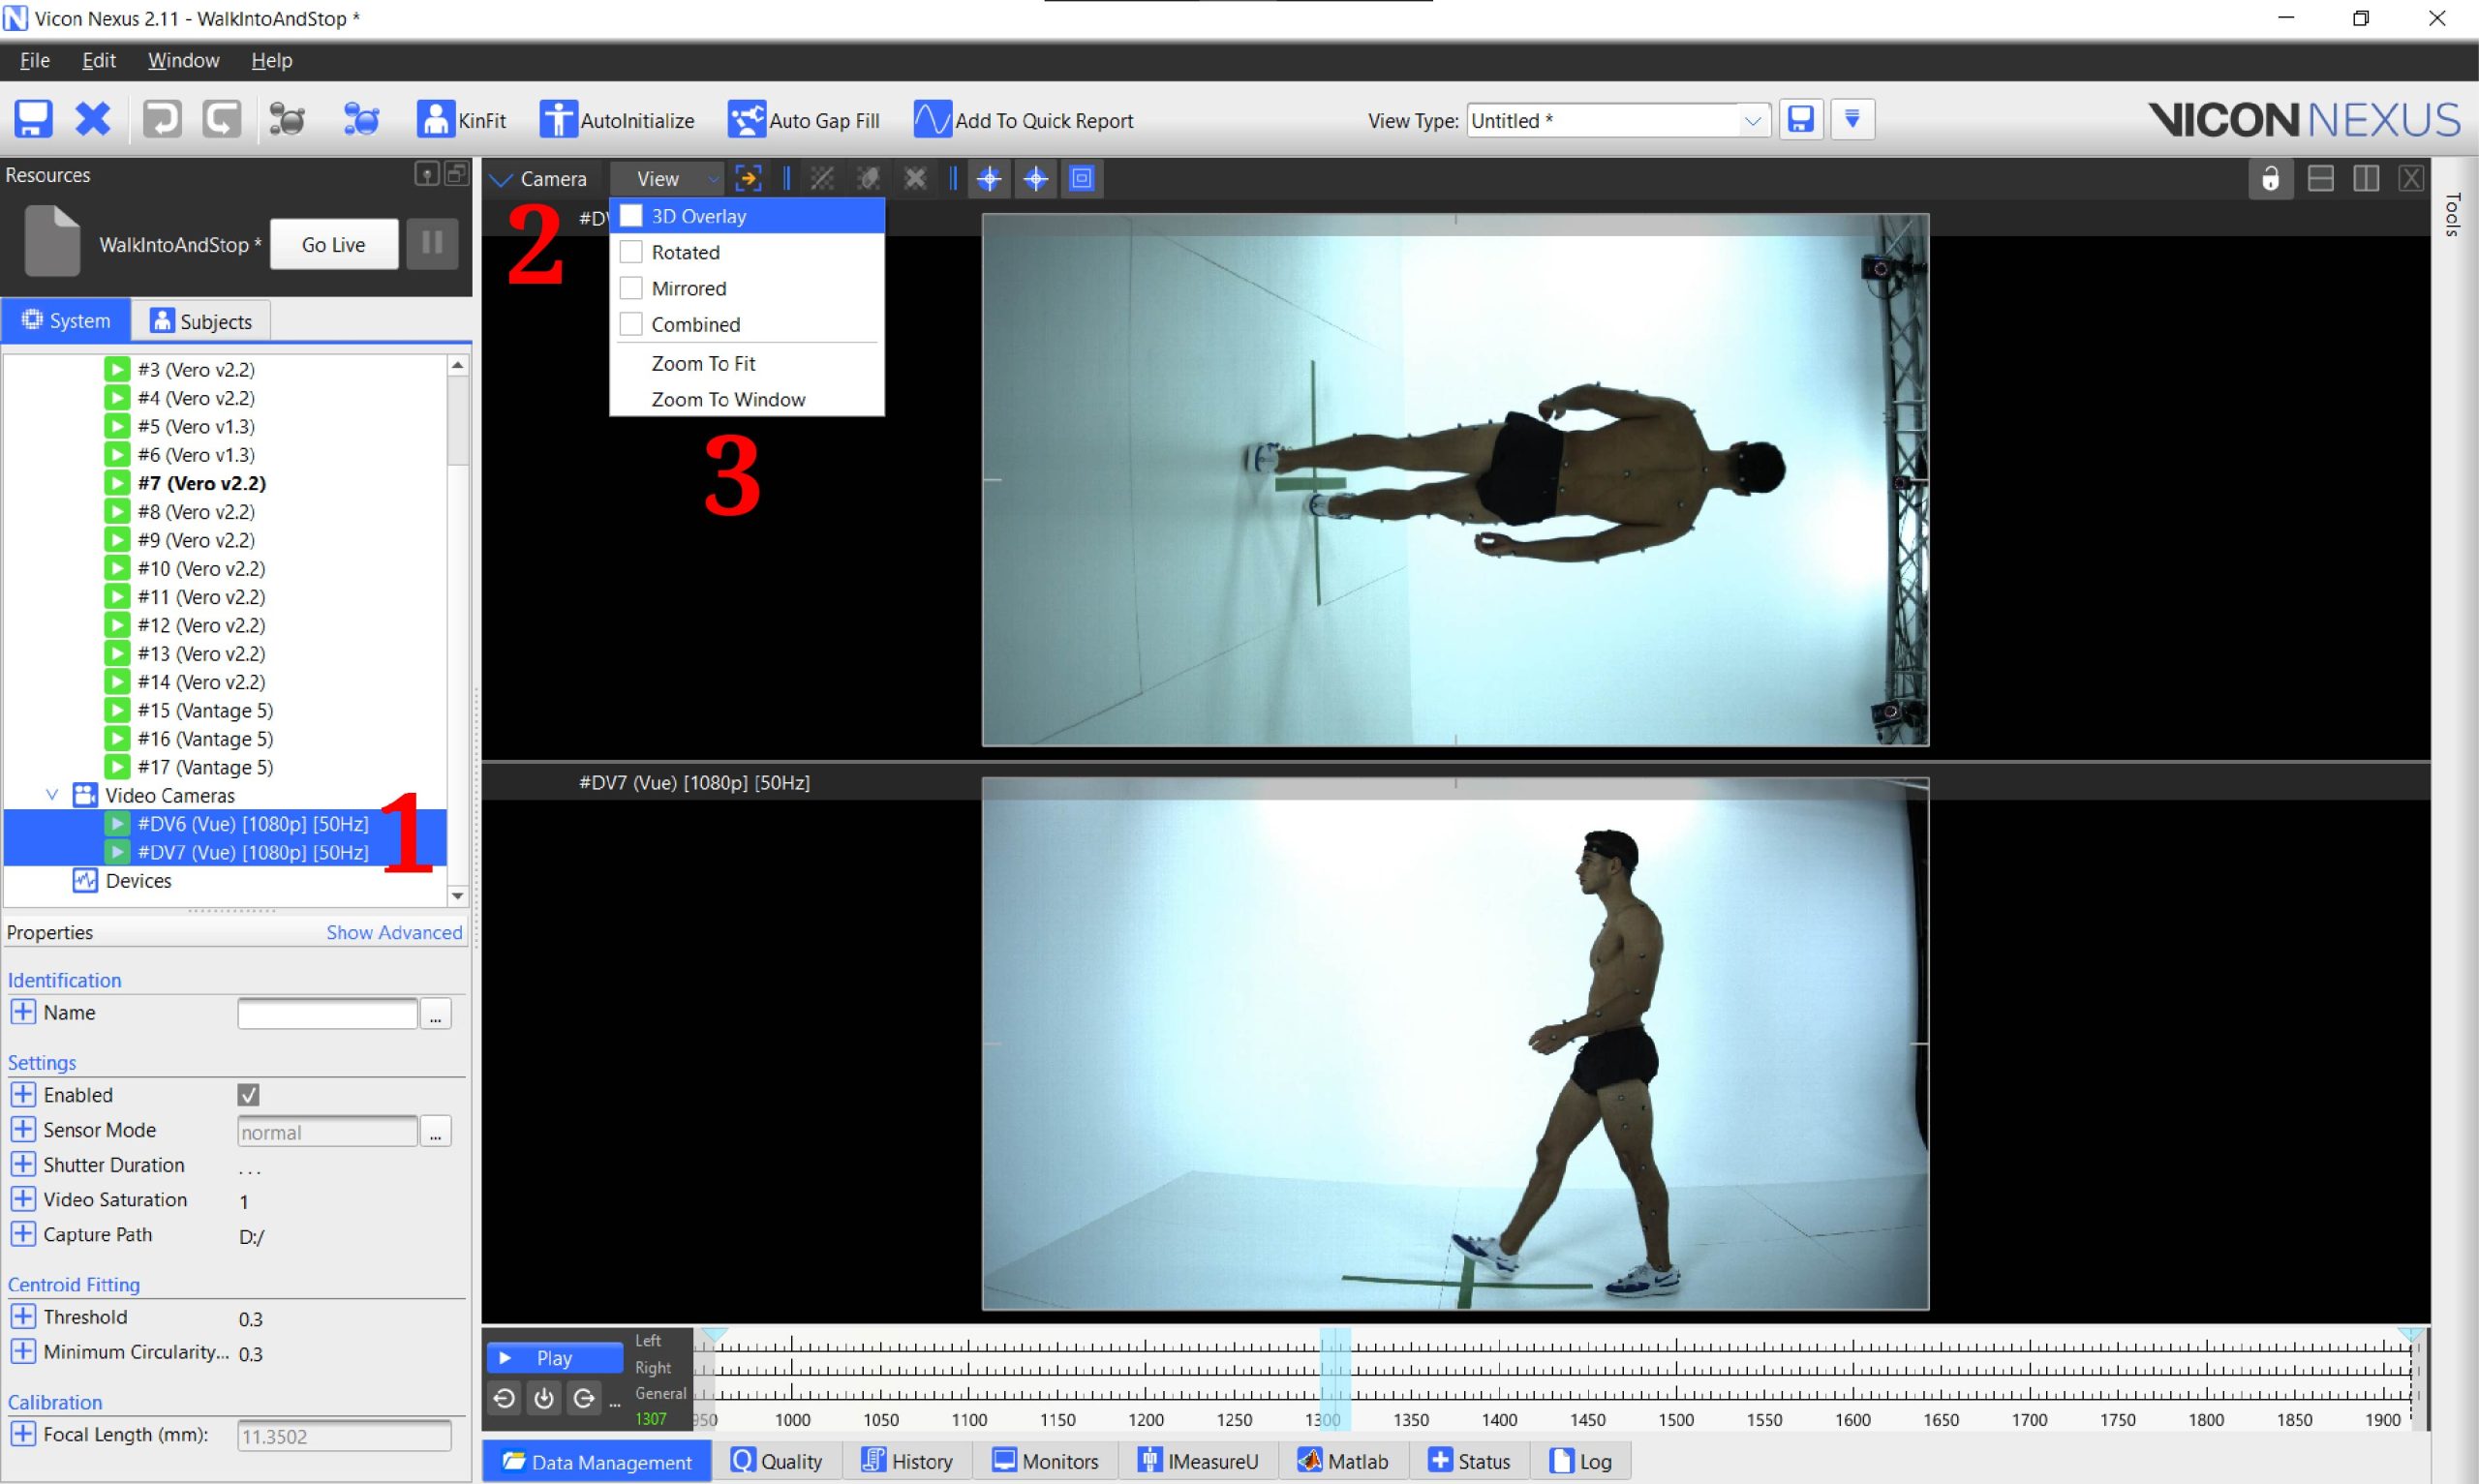
- Select the Vue cameras in your system panel
- Change your workspace view to ‘Camera’ (or create a new workspace)
- From the ‘View’ drop down menu, select 3D Overlay and Rotate
Export Overlaid Video
- Set up a ‘View Set’ – press F7 (or Menu bar>Window>Options), configure display parameters (e.g. turn floor grid off, change colours, show camera positions); save the View Set
- In an existing or new pipeline, add the operation ‘Export 3D Overlay’ video
- Configure the properties
- Choose the View Set you want to display in the output video
- Choose the codec to apply to the video output (recommend FFDShow)
- Choose whether to export the whole trial or part of the trial using the first/last frame options
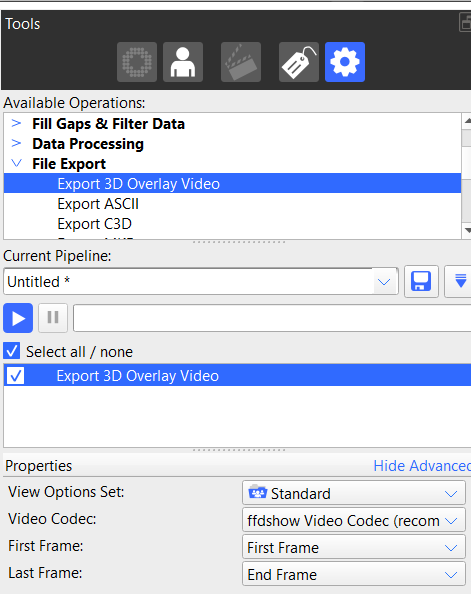
The video will output to the session folder as AVIs, and if you have multiple Vue videos associated with the trial they will all be overlaid and exported for your viewing pleasure!