Gap filling is required when a marker becomes occluded and cannot be accurately tracked. This can be a result of many things: a person moving away from the calibrated volume, a poor calibration, or a marker being occluded from adequate camera view. Sometimes these elements are unavoidable, but you should take as much time as possible to minimise their effect by pilot testing camera placements and settings prior to the actual data collection. Gap filling can be very painful and tedious, So extra time spent pilot testing/calibrating to maximise marker tracking can save hours of post-processing.
Gap filling should only be performed on dynamic experimental trials, never on any calibration trials or trials used for calibrating models.
Official Vicon Documentation Links:
- Fill Gaps in Trial Data
- Nexus 2 Tutorial – Gap Filling
- Nexus 2 Tutorial – Fill Gaps and Filter Data Pipeline Operations
Why are there gaps in my data?
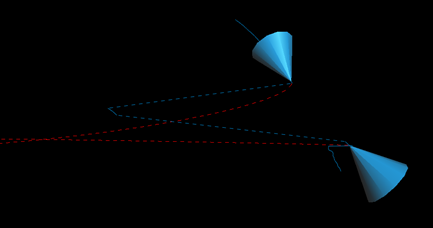
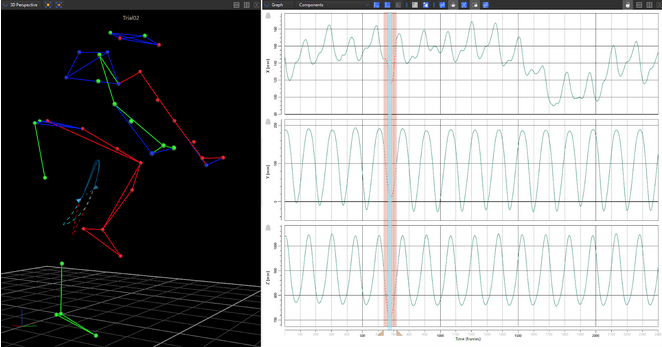
When a marker is tracked during a trial, we are recording its position through time. The path that marker takes through space and time is its trajectory. Vicon Nexus visualises this trajectory with the blue line extending out from a selected marker; a marker represents that trajectory’s position at the selected frame. These ‘tails’ can be toggled on/off in the Options menu (F7) under ‘Trajectories’, however it is recommended to leave them on, particularly during gap filling.
When a trajectory has no positional data for one or more frames, a gap is identified. We can fill that gap using one of several estimation methods and make a more complete trajectory. It is important to acknowledge that although these estimations can often look good, it is still an estimation and may not represent the true marker motion.
 Gap filling can only occur once labelling has begun. Theoretically, all trajectories should be complete for the entire duration of a trial. In reality, there is rarely a 100% recording rate. You can always check how much of your trial is present and labelled using the ‘Quality’ window (next to ‘Data Management’). If you hover over a marker in the ‘Quality’ window, additional information will be presented (gaps, max gap length, % trial labelled). Selecting a marker will bring up slightly more detailed information. A missing trajectory at the beginning or end of a trial will not register as a gap (a gap requires labelled trajectory either side of missing frames) but will register in the ‘Quality’ window as <100%.

Nexus Gap Fill Options
Vicon Nexus provides several gap filling options. Each has strengths and limitations, with different options preferable for certain situations. Ultimately, the user must judge which is the best gap fill option.
Find the Gap Filling window in the Label/Edit tab. The gaps for the trial that you are working on will be in a drop-down list. Double-click on the marker and the first gap will be shown in the 3D workspace. You can also split the workspace and open up Graph view for another perspective.

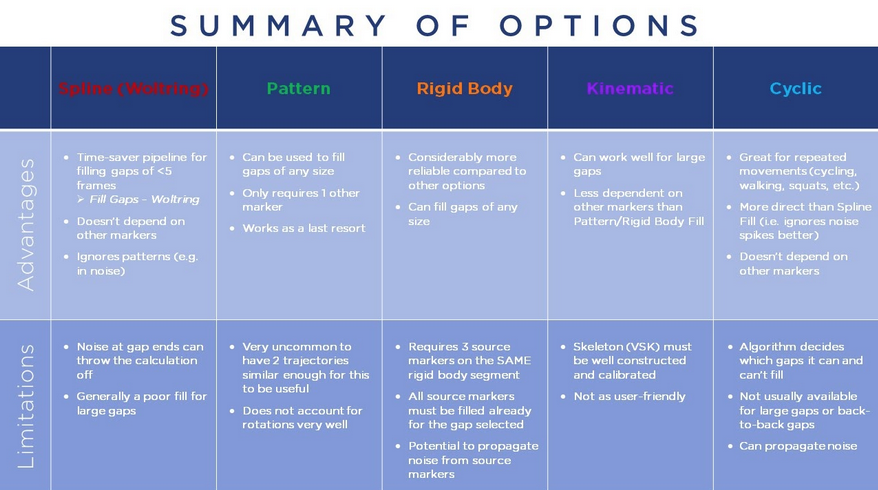
- Spline Fill (red): uses a spline algorithm and existing trajectory data to predict missing values. Highly useful for small gaps and linear trajectories; not so much with larger gaps and longitudinal rotations. As it relies on existing trajectory data, erroneous/noisy frames, often pre/proceeding gaps, can result in poor predictions.
- Pattern Fill (green): this option requires the trajectory data from another marker. The movement of the source marker is replicated for the duration of the gap. The source marker must be complete for the period of the gap. The low requirements for pattern fill make it a weak option that doesn’t deal with segment longitudinal rotations well, but may provide a ‘get out of jail’ option as a last resort.
- Rigid Body Fill (orange): uses trajectory information from three other (complete) trajectories to create a rigid body and estimates the missing data based on the movement of that segment. It is strongly suggested the three source markers be on the same segment as the gap trajectory, and upon a single rigid/semi-rigid mount or base provides the best estimates. Extremely useful when using four-marker clusters. The most robust fill option, but with high requirements (three other complete trajectories on the same segment). If possible use this.
- Kinematic Fill (purple): requires kinematic fitting (KinFit) to be performed on the current trial. If your VSK has been well constructed and calibrated, this can be a useful option. Requires the source segment to be selected which cannot occur until after KinFit.
- Cyclic Fill (light blue): designed for use with repeated, cyclical motion such as treadmill running or stationary cycling, but becomes available in many situations. Similar to spline fill option, relies on existing trajectory data to predict missing positional data.

Pipeline Options
Although it is highly recommended to manually fill gaps, there are times when you may want a more efficient method. Nexus has corresponding pipeline operations for each of the 5 fills which can be added to your processing workflows. To maximise efficiency without sacrificing accuracy, it’s important to have a thorough understanding of the pros and cons of each as detailed above, as well as practical experience utilising each one, before applying these pipelines to your data.
![]()
- Some ‘safe’ pipeline options to optimise your workflow:
- Fill Gaps – Woltring
- as a rule of thumb, set the max gap length to 5% of your sampling frequency (i.e. if you are capturing at 200Hz, the max gap length would be 10 frames)
- Fill Gaps – Rigid Body
- easily set up for the Head, Torso and Pelvis segments (see Vicon’s instructions [1:37-3:07] here)
By Denny Wells
denny@logemas.com


