
Network licenses allow a central bank of seats to be held by a lab/user group, rather than issuing unique individual licenses to each user computer.
Also check out:
Use a Network License
To use a network license that has already been set up, the user must:
- Have the Vicon software (Nexus, Shogun, Tracker, etc.) installed on their computer;
- Have access to the server where the licenses are stored
- Please liaise with your lab manager and/or institution IT department to organise access to the server, this is not something Logemas sets up or controls
Bring up the Vicon Product Licensing program, either by:
- Searching (Windows key) for ‘Licensing’, or
- Opening the unlicensed software (brings up the ‘this PC is not licensed’ message, then ‘Advanced Licensing’).
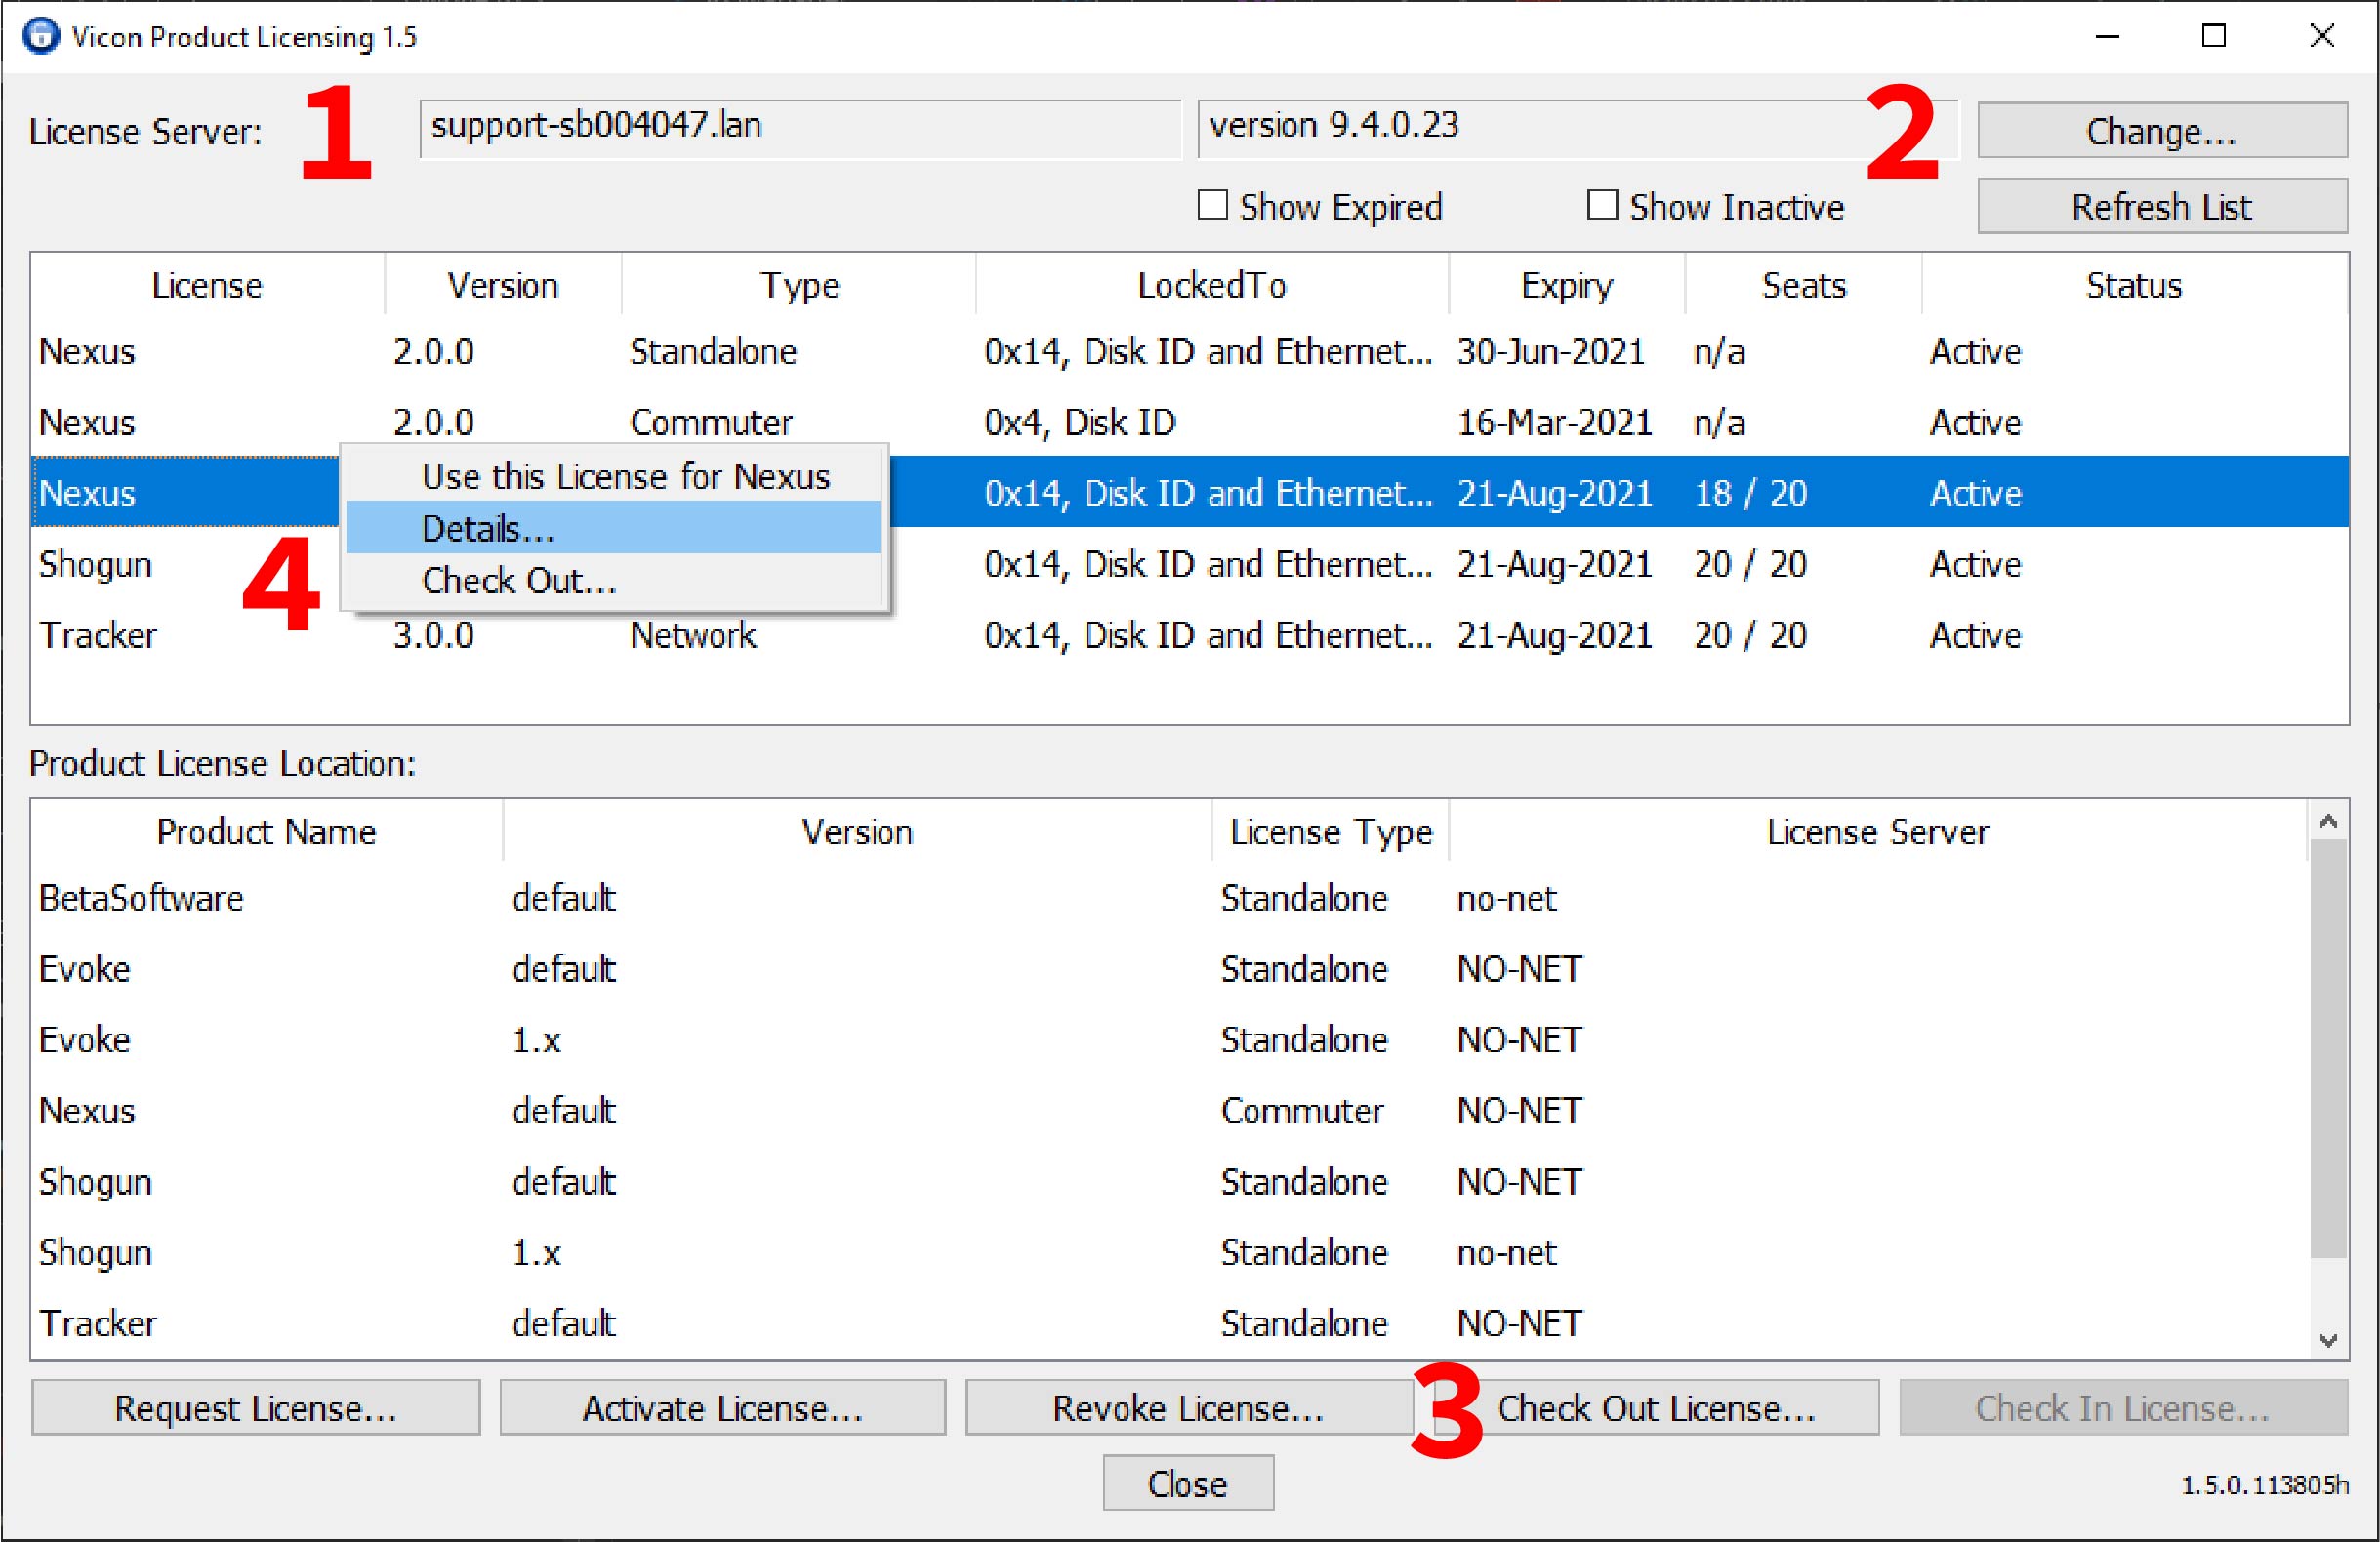
If the box next to License Server is set to ‘no-net’ [1], or no licenses are present, click the ‘Change…’ button [2] and discover the server. Be sure to double click the server name before pressing OK, checking in the main screen that the server name now appears in the top left box.
There are three ways you can use a network license:
- If you are remaining connected to the server while you use the software, you can now re-open the software.
- If you are wanting to use the software away from the server, you can check out a license [3] for up to 30 days.
- If you can’t access the server, you can send the unique remote locking code for your machine (accessible through the ‘View Remote Locking Code…’ or ‘Check Out License…’ button in Vicon Product Licensing) to your lab manager and they can check out a license for you for up to 30 days.
Tip: you cannot return a license early, so only check it out for the maximum number of days you need as it will count against the seat count until that return date.
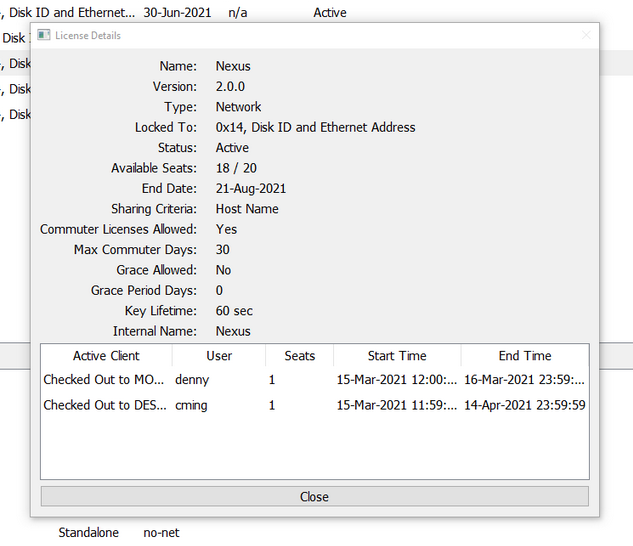
You can also check on when seats will become available again and where the seats are being used by right-clicking on the license and selecting ‘View License Details’ [4].
Don’t worry if your panels are empty when you work in Vicon Product Licensing, our work computer has a lot of licenses!
Set Up a Vicon Network License
If you wish to set up a Vicon Network License you will need to have access to a server. If you work in a large business (e.g. University or Hospital), this will likely require your IT department to create the server and make it available over your network and by specific users. Logemas is unable to help you create or maintain the server.
Once the server has been created, download and install the standalone Vicon Product Licensing program. This is slightly different from the version bundled with the main software programs as it contains the license server.
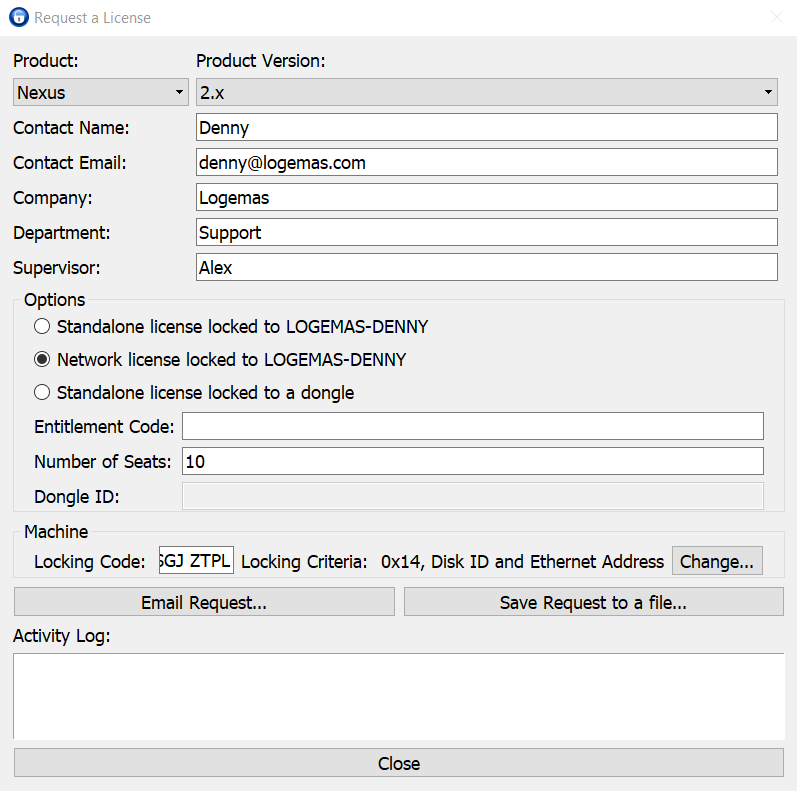
Open the newly installed Vicon Product Licensing, check the server box has a server name (something other than NO-NET). If not present, ‘Change…’ and ‘Discover’ the server (remember to double click it to select it). Then perform the request a license procedure (Request Vicon License).
- Ensure to complete all fields in the top section
- Options section:
- You don’t need an entitlement code,
- Select ‘Network License Locked to [PC Name]’,
- Enter the number of seats to be included (to be discussed with Logemas
Submit the request to support@logemas.com and we will get a license file back to you, usually within 48 hours.
Final step: Activate Vicon License!
Vicon network license technical tips:
- Creating a virtual server removes reliance on hardware (no hardware failure issues)
- Requires windows firewall permissions
- Vicon Licensing uses safenet sentinel licensing
- Vicon Licensing uses UDP 5093 (ensure the port is unblocked)
- DNS is preferred for clients to see the server
- Vicon Licensing is supported on most versions of windows server